Seeking Bespoke Technology Solutions?
Are You Ready to Transform Your Ideas into Innovations?
Contact me today to discover how personalized, high-end tech solutions can meet your unique requirements.
jamie@jamiestarling.com
Search The Site
Explore
Explore By Topic
I
M
P
T
X
Z
I
M
P
T
X
Z
Blog Picks
Making Music with PIC10F322 : Using XC8 for Sound Generation
Making Music with PIC10F322 : Twinkle Twinkle Little StarCreating the MelodySteps to Create the MelodyThe Circuit:The Code:Have a Project or Idea!?Seeking Bespoke Technology Solutions?jamie@jamiestarling.com Making Music with PIC10F322 : Twinkle Twinkle Little Star...
Sound Generation with PIC10F322 NCO and XC8: Emulating the IBM PC/XT Beep
Sound Generation with PIC10F322 NCO and XC8: Emulating the IBM PC/XT BeepThe IBM PC/XT BeepUnderstanding the NCO (Numerically Controlled Oscillator)Key Features of the NCO:Implementing the IBM PC/XT Beep with PIC10F322 and XC8The Circuit:The Code:Have a Project or...
Using PIC10F322 Internal Temperature Sensor to Seed a Random Number Generator with XC8
In a previous post, we discussed setting up the PIC10F322 ADC to read the internal temperature sensor. While the primary use of this sensor is to monitor the die's temperature to ensure it operates within its thermal limits, there are creative ways to utilize this...
PIC10F322 XC8 Code: How to Access the Internal Temperature Module
PIC10F322 XC8 Code: How to Access the Internal Temperature Module
Creating a Light Activated Switch with PIC10F322 and XC8
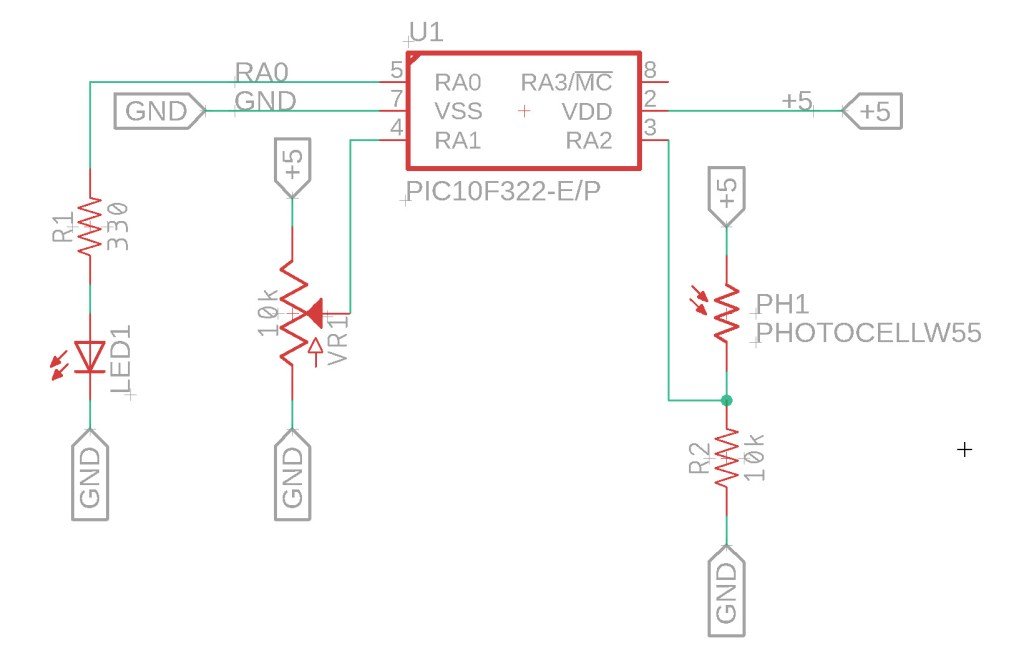
SetupHigh-Level OverviewDetailed ExplanationHardware ConfigurationThe Circuit…The CodeFuture ImprovementsSummaryHave a Project or Idea!?Seeking Bespoke Technology Solutions? In this tutorial, we will create a light-activated switch using the PIC10F322...
Guide to the PIC10F322 Configuration Bits in XC8
What Are the PIC10F322 Configuration Bits?Breakdown of Configuration Bits for PIC10F320 and PIC10F322FOSC — Oscillator Selection BitsBOREN — Brown-out Reset EnableWDTE — Watchdog Timer EnablePWRTE — Power-up Timer EnableMCLRE — MCLR Pin Function SelectCP — Code...
Python Code – Create A Black and White Image using Numpy Array
As you recall - a black and white image can be represented by a 2d array. The below Python code takes a 2 x 5 array (checker board pattern) and using matplot converts it into an image we can see. #%% import matplotlib.pyplot as plt import numpy as np # 2d Image...
Understanding XC8 MPLAB C Header Files
Received a question about – How to separate a program into multiple files. Simple programs can be put in a single file, but when your program grows larger, while it isn’t impossible to keep it all in one file, it starts to become a big pain in the rear. The purpose...
Creating the TV-50 : A Model TV Simulator
Discover the process behind creating the TV-50, a model TV simulator for model railroading layouts. Developed by Jamie Starling, this innovative simulator uses the PIC10F322 board to recreate the realistic flashing and dimming effects of a TV screen inside a model house. Enhance your model train layouts with unique, eye-catching effects that captivate viewers.
Image Processing in C and Python
Image Processing in C and Python : Introduction My idea is to put together a collection of image processing code - that didn't heavily use external pre-written libraries as a way to better understand the code and image processing itself. In other words, to peak...


